Have feedback on the new Karl.gg? Tell us what’s working, what’s getting in your way, or what you’d like to see improved on Discord. Please keep loadout posts focused on builds so players can find them easily. Share feedback on Discord

This build may be outdated.

It was made in an earlier patch, so some upgrades may perform differently today.

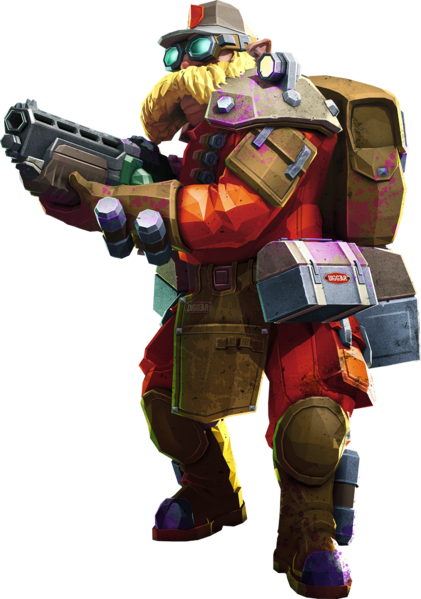
Engineer loadout · Season 5

RJ250 Addict [Stunner + RJ250 Compound]

by Alan · Updated 5 Nov 2024

Primary
"Warthog" Auto 210
Secondary
Deepcore 40MM PGL
Throwable
Proximity Mine
Use this build Salutes · 2

The kit

Weapons & gear

Primary · Shotgun

"Warthog" Auto 210

  1. T1 · A Supercharged Feed Mechanism +1 Rate of Fire
  2. T2 · B Loaded Shells +2 Pellets per Shot
  3. T3 · C High Capacity Magazine +2 Magazine Size
  4. T4 · B Bigger Pellets +1 Damage per Pellet
  5. T5 · A Turret Whip Shoot a Turret with the Shotgun to consume 5 turret ammo and fire a projectile in the direction currently being aimed at by the turret, with a 3 second cooldown between projectiles. Each projectile travels at 75 m/sec, does 160 Explosive element Area Damage in a 2m radius, has a 100% chance to stun for 1.5 seconds, inflicts 1.0 Fear, does 50% Friendly Fire damage, and has 200% Armor Breaking.
  6. OC Stunner Clean · Pellets can now stun an enemy on any body part instead of just weakpoints, and any shots that hit a target that's already stunned deal x1.3 damage.
Secondary · Heavy Weapon

Deepcore 40MM PGL

  1. T1 · A Fragmentary Shell +1m AoE Radius
  2. T2 · A Expanded Ammo Bags +2 Max Ammo
  3. T3 · A Incendiary Compound Lose 50% of Direct, Area, and Armor Damage, and convert it to Heat that will ignite enemies
  4. T4 · C Concussive Blast Stuns creatures within the blast radius for 3 seconds
  5. T5 · A Proximity Trigger After 0.2 seconds of arming time, any grenade that passes within 2m of an enemy will detonate after a 0.1 second delay. After being armed, grenades will emit a green light. Grenades no longer explode upon impacting terrain, but instead automatically self-detonate 3.3 seconds after being fired or when they stop moving. Additionally, x1.1 AoE Radius.
  6. OC RJ250 Compound Balanced · Jump and shoot the ground beneath you to "blast jump", which adds up to 11.65 m/sec to your velocity based on how far you are from the explosion center. Can also be used on allies who are jumping. Additionally: x1.7 Max Ammo, -0.6 Reload Time, and -35 Area Damage.
Equipment

Platform Gun

  1. T1 · B Expanded Ammo Bags You had to give up some sandwich-storage, but your total ammo capacity is increased!
  2. T2 · A Plastcrete MKII Shock-absorbing compound reduces fall damage
  3. T3 · B Repellant Additive Enemies will avoid walking on the Plastcrete Foam whenever possible.
Equipment

LMG Gun Platform

  1. T1 · A Gemini System Can deploy two separate sentries at once. Additionally, +90 Ammo.
  2. T2 · B Quick Deploy Takes less time to build a sentry.
  3. T3 · B Stun Hit 'em so hard they can't recover. Every shot has a chance to stop the target in its tracks.
  4. T4 · A Defender System A design variation with greatly increased shot power and a focused scan angle.
Equipment

Engineering Suit

  1. T1 · A Improved Generator Shield begins to regenerate sooner.
  2. T2 · B Healthy Max health increased
  3. T3 · A Hazmat System Reduces the damage taken from poison.
  4. T4 · C Breathing Room Temporary invulnerability after being revived.
Equipment

Pickaxe

  1. T1 · A Power Attack Enables Power Attacks
  2. T2 · A Serrated Edge +120 Power Attack Area Damage
Throwable

Proximity Mine

A timeless classic. Sticks to any surface and explodes shortly after an enemy enters its trigger area. And if it fails to find a target, it can be safely disarmed and retrieved. Note: proximity trigger requires a few seconds for calibration.

Field notes

Loadout guide

PERKS

Passive: Resupplier, Born Ready, Vampire

Active: Iron Will, Dash

Loadout image

I switched to Fat Boy once in a mission and I already missed using RJ250 Compound. All that open space... and I can't fly through it and die from fall damage.

I decided to use Stunner for this build because I personally think it's the best Overclock for Turret Whip in my mind (Sorry Mini Shells enthuisasts, I like it too but the problem with Turret Whip isn't Warthog ammo). It's fantastic for finishing off any enemies who survives your PGL shots due to the T4 stun mod.

T2A for RJ250 Compound PGL can also be alternatively built for T2B if you want a little more oomph to conisistently kill Grunts or Slashers.

I just went with Proximity Mines just cause I found them very fun to use on the missions I played with this loadout. The Shredders or Plasma Bursters are a better option if you want to utilize your mobility more during swarms.

Vampire is decently useful for getting some health back after jumping a lot, it's like putting a bandaid over a massive gaping wound but it's at least nicer than nothing.

Also whenever I'm bored during a mission (such as waiting for my team to get ready or waiting for Molly to finally reach the drop pod) I like to practice my jumps a bit, if you don't mind having some downs on your stat screen.

Squad chatter

Comments