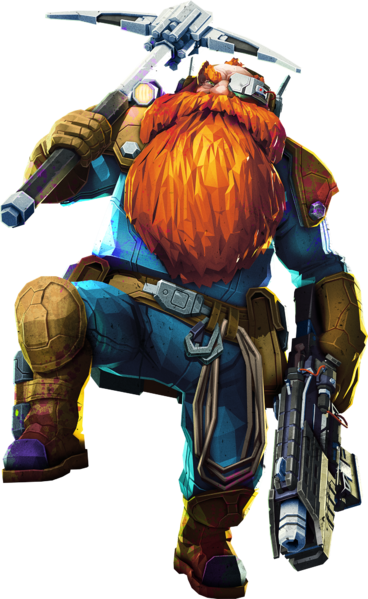
Build idea:
This loadout is designed to have an ammo efficient DRAK-25 Plasma Carbine with good sustained dps and the capability to shoot long bursts.
In contrast to my DRAK-25 SBB Sniper build this loadout can be used for all zones and mission types even those with enviromental damage and withhout M.U.L.E.
Shield Battery Booster still relies on a high uptime for the shield to gain its bonus but the changes to the overclock make it much easier to keep the shield at 100%. It now starts regenerating much faster which helps a lot when taking only small amounts of chip damage. However it takes a long time to regenerate all the way from 0 to 100%. Therefore it is crucial to avoid losing the shield completely (e.g. overheating the DRAK-25) at all cost.
The secondary weapon provides crowd control to not get overrun by swarms and buys time to properly manage the Plasma Carbine's heat. Freezing bugs also bypasses the DRAK-25's weakness against heavy armor.
The equipment provides extra mobility and even more crow control to avoid taking damage and helps keeping the shield at 100%.
Perks:
- Hover Boots / Shield Link:
Preventing fall damage and losing all the shield is the main reason for this perk.
Ideally Shield Link would be taken by another dwarf. Consider taking Berzerker when playing solo.
- Field Medic / Iron Will / Shield Link:
Both are good perks when playing online to keep the party alive.
For solo play Beast Master is a great alternative.
- Born Ready:
To make sure the secondary weapon and Flare Gun are always loaded.
- Elemental Insulation:
The build is designed to work in zones with constant elemental damage such as Magma Core. Elemental Insulation helps to reduce the amount of damage the shield takes.
Could be changed to Vampire depending on zone.
- Deep Pockets:
Allows carrying more minerals during missions without M.U.L.E.
Could be changed to Vampire depending on mission type.
Primary Weapon:
DRAK-25 Plasma Carbine with Shield Battery Booster overclock and upgrades that improve heat management.
- T1: Improved Thermals
Technically all the upgrades are viable and each has its own benefit by either shooting faster or making it easier to hit with faster projectiles. But I can't stress enough how important it is to avoid overheating and therefore Improved Thermals is the choice.
- T2: Increased Particle Density
The overclock already increases the battery capacity and there is no need for even more. So instead taking the extra damage is an easy choice.
- T3: Custom Coil Alignment
Heat management is very important and therefore Gen 2 Cooling System is almost too good to pass up. While this upgrade doesn't allow for larger bursts before overheating it does reduce the time betweem bursts and as a result higher sustained dps.
However, I really like Custom Coil Aligment for the improved accuracy. Give it a shot if heat management isn't an issue and the higher weakpoint / burst dps is preferred over sustained dps. Use at own risk though!
- T4: Overcharged PCF
Overcharged PCF is great because it provides a little extra damage and some crowd control via electrocution slow. It also makes it easier to hit those electrocuted bugs.
Destructive Resonance Amp on the other hand improves the damage output against armored targets such as Glyphid Grunt Guards and Dreadnoughts. The choice is yours.
- T5: Thermal Feedback Loop
Provides a little extra dps when above 50% heat but also make it a little harder to manage the heat when the additional rate of fire kicks in.
Not taking Manual Heat Dump because it takes too long to regenerate the shield back to 100% after manually collapsing it.
If Thermal Feedback Loop causes too much overheating on accident when the extra rate of fire kicks in consider taking no upgrade at T5.
Secondary Weapon:
Zhukov NUK17 with a standard Cryo Minelets build to provide crowd control and also freeze armored bugs and make them easier to kill.
- T1: High Velocity Rounds
There is not much need for more ammunition so taking the extra damage is an easy choice.
However for online multiplayer sessions with 4 dwarfs taking Expanded Ammo Bags might be better.
- T2: Quickfire Ejector
All the upgrades at T2 are viable. The quicker reload is the best option when firing multiple magazines successively in cases the DRAK-25 overheated or when dealing with Swarmers.
- T3: Better Weight Balance
Helps to place the minelets more accurately and reliably freeze a Pretorian or Spitballer with a single magazine.
- T4: Blowthrough Rounds
Enables freezing bugs and terrain at the same time when aimed correctly.
- T5: Get In, Get Out
Movement speed bonus after emptying the clip to help relocate faster and avoid taking damage.
Alternate Secondary Weapon:
There is the possibility to pair the Plasma Rifle with the Nishanka Boltshark X-80 Cryo / Pheromon Bolt build (ACAAA) for maximum crowd control or a Jury-Rigged Boomstick Double Barrel / Stun build for extra damage instead of the Zhukovs depending on personal preference and mission type.
Equipment:
The Grappling Hook is set up for the shortest wind-up time and cooldown for maximum mobility and there is Hover Boots to stay mid-air and avoid losing the shield to fall damage.
Voltaic Stun Sweeper provides a lot of crowd control via stun and is great at dealing with Swarmers, Naedoctyes and Exploders. It's also the grenade with the most amount of them which allows liberal usage. Cryo Grenades are an excellent alternative to freeze bugs (especially Mactera) in an emergency such as accidently overheating.
The "Fox" Armor Rig is set up so it starts regenerating the shield as quickly as possible after taking damage (<1s). However it will take a little over 8s to regenerate for 0-100% after it collapses so try to avoid that as much as possible. In case it happens though there is a chance to stun bugs which helps getting to a safe position.
Weaknesses:
Shield Battery Booster depends on the shield being at 100% whenever the DRAK-25 is fired. Without the shield at maximum the damage output goes down significantly and aiming becomes much harder due to the loss of projectile speed.
Heat management is absolutely crucial to avoid overheating. The Drak can shoot for a decent amount of time before overheating but in the heat of the battle (pun intended) it can be tricky to monitor and manage the heat. I highly recommend using and customizing the Weapon Heat Crosshair mod (verified) to help with that.
The shield starts regenerating very quicky but it takes a very long time for to reach 100%. The build can easily deal with taking chip damage but avoid taking large junks of damage as much as possible.
No-Go:
This build is NOT suitable for missions with Shield Disruption warning.