Background
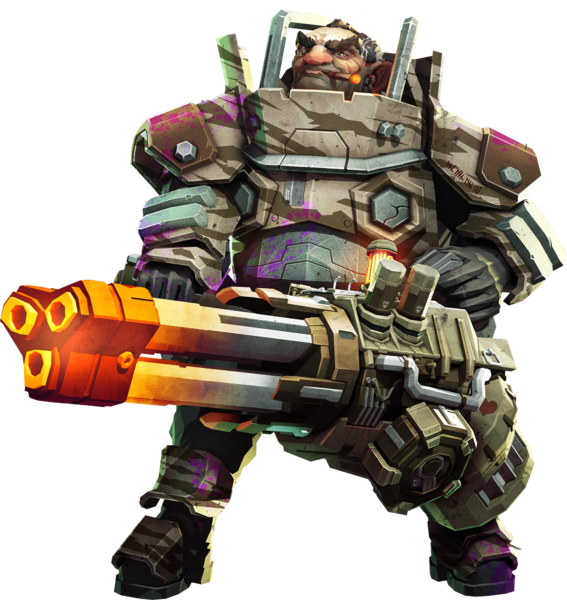
As of U35 the kill animations have been getting waaaaaaay better, especially with weapons like Sludge Pump and recently with plasma/fire based animations. But what if that's not enough for you? What if you want to experience the thrill of exploding animations like volatile guts, but for EVERY mission? I've got good new for you miner! U36 introduced the Armskore Coil Gun -- I think this weapon can give you exactly what you think you want, but actually need in your life!
Loadout
"Lead Storm" Powered Minigun
- T1B: This weapon is pretty accurate at full-spin and since this OC makes the weapon best used at close range, I don't see a strong case for T1A or T1C.
- T2A: More ammo = more killing! The extra damage will come from enemies burning to a crisp.
- T3B: This one is essential to make sure that enemies are standing still so you can take them out swiftly and with precision using the coil gun.
- T4B: The faster the gun starts up, the sooner enemies catch fire
- T5A:
Aggressive Venting will allow you to shoot to your heart's content and make sure that everything around you burns, meaning plenty of targets to spill some carnage. T5C is also a viable substitute as it will let you burn targets from a distance.
- Burning Hell": By burning the targets directly in front of the Gunner, you are opening windows for procing the coil gun to do it's magic!
Armskore Coil Gun
- T1C: Extra damage is tempting to take due to the OC's damage nerf. But it is much more valuable to have maximum charge speed and to compensate for damage loss using an accelerated T2.
- T2A:
Overcharger will allow the coil gun to compensate for OC's damage nerf by quickly getting it anywhere between +48 to +64 damage in a matter of seconds.
- T3A: Stunning nearby enemies will allow for easy melee or Leadstorm kills.
- T4A: The Leadstorm melts pretty much anything in front of it so no need for extra up-close damage. Might as well get a defense buff so you can take your time focusing your shot.
- T5A: This is the skill that pulls everything together. Killing burning enemies will create a bomb of fire and gore so beautiful it will bring a tear to Karl's eye.
- Backfeeding Module: This OC will significantly increase the coil gun's ammo supply, allowing you to set off as many carnage bombs as possible!
Equipment
This is just my personal opinion. I don't think any of this actually matters in this build. The only thing I would stress is the armor config. Because this is a close combat build for the gunner the likelihood of getting hit is pretty high. Having a static discharge build will increase your chances of getting revenge kills or bailing out.
Perks
Passive
- Vampire: This will allow the gunner to recover lost health while enemies are stunned or near death due to fire. Since you'll be up close might as well take it
- Resuplier or Sugar Baby: It's good to have a source of health recovery for this build. I'd lean towards
Resupplier for gunner since he is the least mobile out of all the dwarves.
- Thorns: This is practically your only failsafe against small bugs with this build.
Active
- Iron Will: Useful when paired with vampire to keep you from going down again if things go south.
- Dash: Very useful for getting out of close quarters when being overwhelmed.
Grenade
Incendiary will give coil gun more opportunities to work its magic against some of the larger bugs.
Strategy
General Playthrough
Burning Hell will allow you to get up-close and personal to any incoming swarm and light them on fire. For most small-mid sized bugs, this will typically kill them instantly given the amount of lead and fire you are pumping through them. However, beefier bugs, such as slashers and grunts, will not go down as easy; this is good. After about a half second of firing, these bugs will be at around 50% - 25% of their health, likely stunned and definitely burned. This gives you an opportunity to stand back, swap weapons, and make way for the star of the show.
The Coil Gun will charge insanely fast, allowing it to go past max damage in the blink of an eye. Shooting and killing this now immobilized enemy while it is burning will cause it to explode in a glorious display of fire and guts. This will gravely injure, if not kill, everything in a 3m radius of the target, making it an extremely cost-efficient swarm clearer. After the explosion, you will have time to reload, swap back to Leadstorm, rinse & repeat. If you're worried about eating up too much ammo, don't. You start with 1000 - which gives you a grand total of 25 shots! That's 25 magical displays of glorious explosions!
I've found that this technique only works consistently well against beefier medium bugs, such as :
- Slashers
- Gaurds
- Mactera
- Tri-jaws
- Brundle
Anything lighter burns to a crisp before you can change weapons. The coil gun does not do enough damage to larger bugs, such as Praetoreans, to predictably and consistently land a killing attack. They will either be on the brink of death after the shot, burn will kill them before you have a chance to land the kill, or they will stop burning by the time you shoot. Since that's the case, it is best to have the leadstorm kill these bugs off with a rain of bullets. This will eat up a lot of heat, and that's where the fun begins.
When your heat output is more than 75% and running
Aggressive Venting, it is more worth it to keep the bullets coming than to switch weapons after stunning an enemy. That's because when you overheat, you will deal massive heat damage to everything around you and it will cause fear in all of them. Burning Hell increases heat consumption by 50% -- by utilizing this mechanic you are turning this OC's biggest downside into a massive asset! While your gun is cooling down (which is downed by half thanks to T5A), you might as well switch to the coil gun and kill off any remaining clusters since they will all be burning and likely ripe for the picking.
For those not keen of the idea of overheating intentionally, Burning Bullets may be a good substitute, as it will give you the added bonus of igniting targets that are at a distance. If done correctly, swarms can be narrowed down with long distance coil gun shots and priority targets can be weakened down with flames. The only downside is that if you accidentally overheat, there is a 10s cooldown and no cool explosion to justify your mistake.
Warnings
First thing's first: I love explosions as much as the next guy. But please understand that 3m is a wide range. Make sure you're taking those extra few steps back and your teammates are not near the swarm, or you're going to singe a beard or two!
The coil gun is a massive asset to this build, but only when used with the leadgun. None of the tree skills selected contribute to its trail, which has a few tradeoffs:
- The coil gun no longer has small bug clearing potential, meaning swarmers and jellies will get easy access to your ankles.
- High priority targets take no additional effects from the coil gun other than damage dealt – which is nerfed. It will take x2 - x3 times the amount of shots to take down a high priority target with the coil gun alone.
Thorns is your only bet to fend off swarmers and jellies efficiently by yourself. As for high priority targets, the strategy is to get close to them to deal burning damage if possible, or leave it to someone else on the team with range. Otherwise it will cost you a lot of ammo to make a long-range kill.
Be aware of what your teammates are packing. Drillers tend to fight up-close as well, and if they are carrying a cryo build you two will be in constant battle with one-another and neither of you will be able to trigger your temp status. Make sure to keep a safe distance or coordinate so the other can move in and cause temp-shock after the target is burned/frozen.
Increase stun is likely to keep you out of harm's way, but it isn't guaranteed. If things get too hairy, remember to ease off and use dash to flee to safety. Gunners don't have a lot of mobility, so if your dash and sheilds are out and you are surrounded it could be a tough situation to get out of.
Conclusion
This build can be a little tricky at first since it is against the typical gunner strategy of spray and pray into a crowd of glyphids. However, when pulled off correctly, you will be creating a 4th of July display of carnage that would make Karl weep. If you love the concept of Gunner just lighting everything in its path ablaze, please check out this sister build here.
Enjoy the fireworks!